UA-33535312-1
Immerse yourself in all things beer
 
Picture
Time for some tasting notes from my second incarnation of the Redheaded Rye-child.  Here is a link to the recipe in case you missed it but basically this is an American Amber Ale with a quarter Rye Malt and some dry hops.

http://inhousebrew.weebly.com/red-headed-rye-child.html 

Aroma:  Picking up a bit of the spicy, herbal notes that can come from Sterling hops but not really getting much of the Cascade right now.  The malty sweetness is coming through as well.

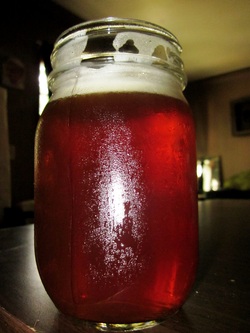
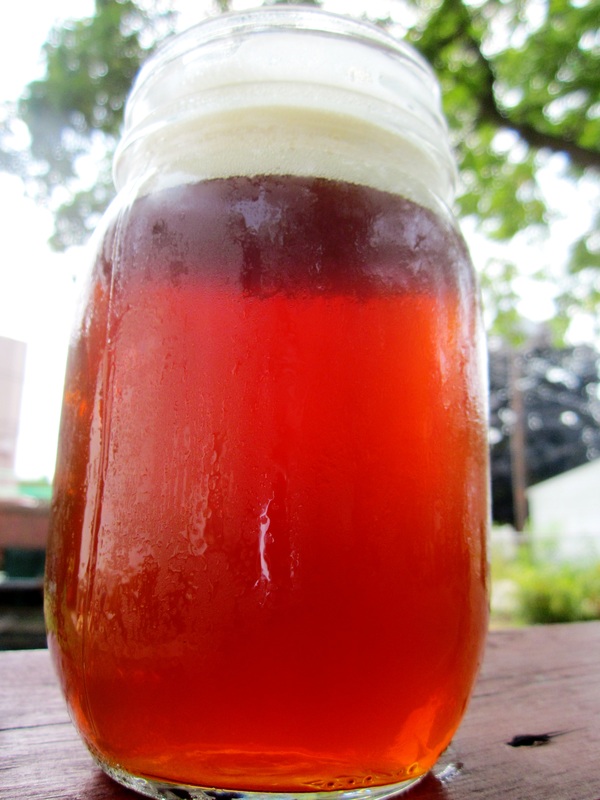
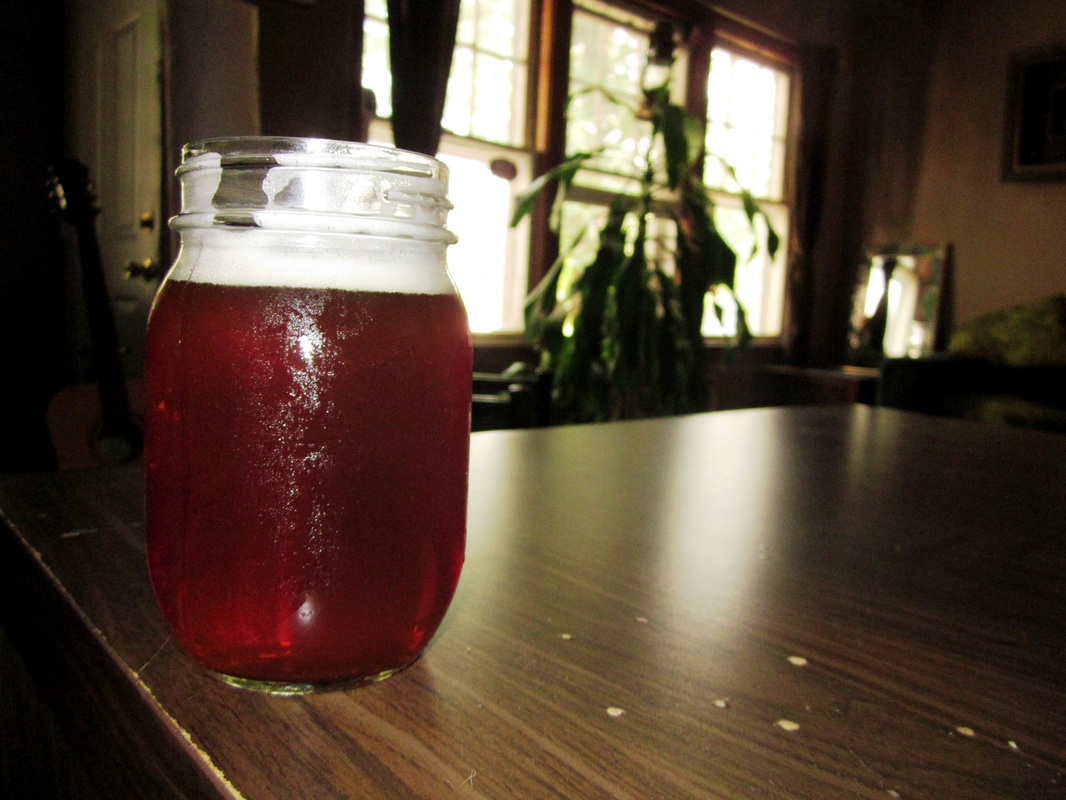
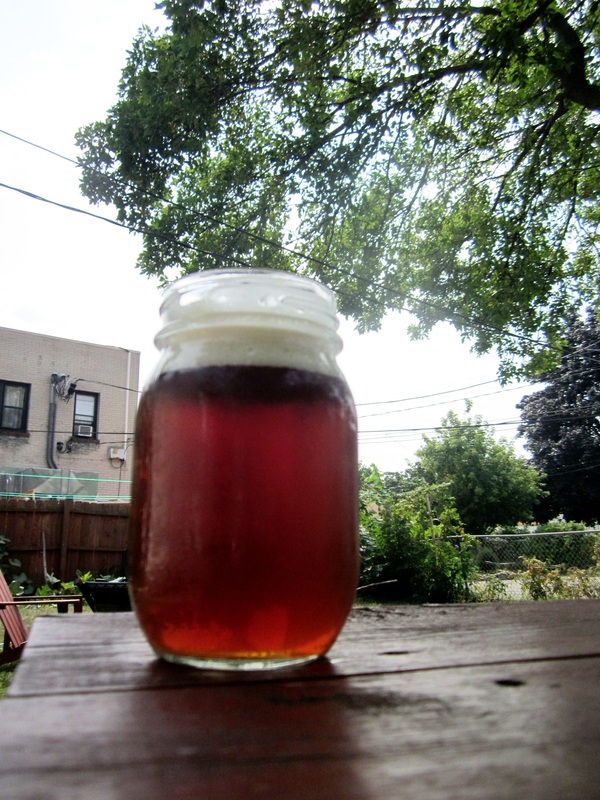
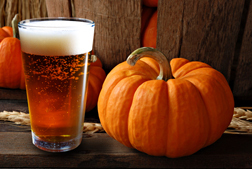
Appearance:  Looks pretty damn good for a red ale I think.  Clarity came through after a week on tap in the freezer.  Great head retention with all that Crystal.  Color is pretty good and I'll admit I borrowed the idea of the C-120 in combination with Special B from an online forum.  With most beers I wouldn't fret about color but when making a Red Ale I feel like it should be RED.  Next time I think I'll try a full half pound of C-120 and Special B each to see if I can get a deeper red color.  

Flavor:  I think I've achieved a nice balance on this beer between the caramel sweetness of the C-120 and Special B and the dryer spiciness of the Rye Malt.  While it starts off sweet it finishes mostly with the Rye flavor and the Sterling hops lingering.  Still not much to be heard from the Cascade.  Not bad, but next time I think I will drop the Sterling hops and stick strictly to a citrus based hop combination.

Mouthfeel:  This beer has a nice full body resulting from the higher percentage of crystal malts and the high mashing temperature.  Finishes well and goes down pretty easy.  

Overall Impressions:  Pretty much what an American Amber Ale with 27% Rye Malt and some dry hops should taste like.  More full bodied than an APA but more heavily hopped than a traditional American Amber.  It's getting there.

Next Time:  This beer falls into the weird specialty category working off a American Amber Base per the BJCP and the questions for next time mostly revolve around whether or not I should keep it there or up the hops and gravity and just turn it into more of a Red Rye IPA.  I feel like I have a decent start on this beer after two trys and think a Red Rye IPA could be a completely different beer (that I will need to make) but I'll stick with what I have going on this one.  I know I like the combo of the C-120 and Special B and will try upping those as previously stated to achieve a more reddish tone.  The rye is good, but I might even up it a little bit further.  The hops I like but think that a more citrus based hop combination with more backloaded toward the end of the boil will improve the recipe.  As for everything else I think it stays as is so until next time, bottoms up!    

 
Picture
After realizing that the pumpkin in our garden was not ripe yet and thus the Brown Pumpkin Ale would have to wait I decided I still had the itch to brew something and I've had this basemalt idea in my head for a while now.  Simply put, I'm brewing up four SMaSH beers; one gallon a piece with two pounds of basemalt, half an ounce of EKG hops and a half package of US-05 in in each.  Gravity should hit around 1.045, with about 30IBUs.  

Last night I brewed up the Vienna and the Maris Otter and everything went surprisingly smoothly.  I mashed the Vienna, transfered it to a boil kettle and after fifteen minutes of boiling I mashed in the Marris Otter.  I figured this way I would have 15 minutes post-boil in order to chill the Vienna, clean the boil pot and get back upstairs to remove the bag from the Maris Otter.  I hit it almost perfectly! 

I unfortunatley missed some of my numbers.  Shooting for 65% brewhouse efficiency without sparging I was a little low, closer to 60%, which dropped my beer toward the lower end of what I was looking for but I'm sure that won't matter.  Tonight, when I do the Munich and the Rahr 2-Row I'm going to save a gallon of water out for a sparge.  I thought about making my grind finer but in the name of science I've decided to keep that constant to see if the sparge will get me any higher.  We'll see, Beersmith is telling me my Mash Efficiency was at around 80%. 

 
So after looking through my first post and what I gathered as the basic guidelines for a Pumpkin Beer I had some thinking to do.  First off I needed to decide on the style.  My initial thought was a stout or a porter but neither are my girlfiends favorite style so in the end I decided on going with English Style Brown Ale.  My recipe is going to come out somewhat of a hybrid between the Northern Brown and the Southern Brown in that it will be more lightly hopped like the Southern version although the gravity and color will fall in line closer to that of a Northern Brown Ale.  Each uses similar malts, hops and yesat so that wasn't an issue. 

http://beersmith.com/blog/2008/07/09/brown-ale-recipes-brewing-styles/
http://www.bjcp.org/2008styles/style11.php

69.2% Maris Otter
15.4% Crystal 80
7.7% Flaked Wheat
3.8% Chocolate malt
3.8% Amber Malt
One pound baked and skinned pumpkin cubes

16 IBUs EKG at 60 minutes
8 IBUs EKG at 15 minutes

1/2 teaspoon Cinnamon, 1/4 teaspoon Ginger, 1/8 teaspoon, Nutmeg, 1/8 teaspoon Clove.
After it is all thoroughly mixed use half at the end of the boil and reserve the rest to add later depending on how much flavor/aroma you want.

London ESB Wyeast 1968

Est SG 1.057
Est ABV 5.6%
22 IBUs
25 SRM
 
Picture
Fall is approaching, the leaves could change at any point and the garden ready for harvest.  So what does that mean for the homebrewer? Pumpkin beer!  Honestly though I’ve never made one of these and have never been crazy
for the style but the girlfriend likes them and this could be an interesting  adventure so I’m out to make my first Pumpkin Ale.

http://byo.com/component/resource/article/327-brewing-with-pumpkin-tips-from-the-pros
http://drinks.seriouseats.com/2011/10/homebrewing-pumpkin-ale-how-to-make-pumpkin-beer.html
http://www.homebrewtalk.com/f12/pumpkin-beers-discussion-developing-recipes-tips-tricks-good-practices-131786/
http://beerutopia.com/2008/09/25/home-brew-pumpkin-beer/

Above are a handful of links I found useful in researching this beer.  It seems
there are at least a few guidelines to follow when putting together a recipe.  
 
First:  It seems like you could chose any base style you want so long as it is
not overly hopped so all you IIPA fiends will need to tone it down. 
From what I’ve read about 20IBUs should be good so some solid starting
points could be a lightly hopped Pale Ale, an English Brown, a Porter or
Stout.  Mostly you want something
that doesn’t compete with the pumpkin spices and flavors.  

Second:  It seems most people mash pumpkin in with the grain although you can also
add it in to the end of the boil which is less tricky. 
Mashing is problematic and rice hulls are advisable because a stuck
sparge with a bunch of pumpkin in your mash is pretty common. 
Also, make sure to adjust your strike water for the added mass.  Either raise your initial temperature,
heat more strike water than planning and/or have a tea pot of boiling water on
hand to adjust.  

Third:  Baking the pumpkin first will caramelize it a bit and provide more flavor. 
Sixty minutes at 350* should do the trick. 
Gut the pumpkin, cut it into halves and cook it before pulling it out and
chopping it up further.  One site I
read said one pound minimum for five gallons while five pounds or more will
provide a healthy dose of pumpkin flavor.

Fourth:  Many people argue that the pumpkin itself adds little to the beer in terms of flavor or fermentable sugars and that a good pumpkin beer is all about the spices.  This however seems like a copout to me because I like doing things the hard way.

Fifth:  It is very easy to over spice your beer to the point of it being undrinkable so take it easy.   One teaspoon per five gallons should be noticeable.  You can always add more post fermentation but you can’t take it out. 

Sixth:  Make sure  you like pumpkin beer or know someone who does!

That's all for now.  Be back shortly when I devise a recipe.


Picture
So after my incredibly long and trying decoction brew day a while back I wanted something easy to do so I wrote up a quick recipe for a 2.5 gallon APA using some 2-Row mixed with about 7.5% each of Biscuit Malt and C-20.  For the hops I figured I would try out a couple of new ones and decided on Palisade which I've gathered is a neutral bittering hop and Australian Galaxy for their passion fruit flavor and citrus aromas.  Keeping with the theme of simplicity I used straight up, good old Safale US-05.

There are so many good write ups out there that I'm not going to delve into process much but rather just post some links and discuss a couple reasons why I enjoy the BIAB process.  

I personally like these two explanations because they were all about stove top BIAB which is what I do.
http://www.northernbrewer.com/connect/episode/brewing-tv-episode-54-jakes-got-a-brand-new-bag/
 http://homebrewmanual.com/brew-in-a-bag/ 
This one was also great and was for larger batches outside:
http://www.homebrewtalk.com/f36/biab-brewing-pics-233289/
 
So why do I love BIAB?  I'll give you three quick reasons.
1st:  It's super easy!  With an hour long mash, an hour long boil and all the heating and cooling time in between the brew day really isn't much shorter but it feels easier for some reason.  Perhaps its because I don't have to lug all my cooler gear from up in the basement and the burner and propane from the garage.  Perhaps it's the fact that I get to sit in the comfort of my own home and just hang out while it works its magic on the stove top.  Perhaps it's how easy cleaning and putting away equipment is.  Or most likely it's the combination of all four.  

Either way, BIAB is simple.  Especially when employing a full volume mash without a sparge.  I hit all of my numbers perfect with an expected brewhouse efficiency of 60% and I'm sure I could have gone higher had I sparged a bit but I was once again shooting for something quick, easy and painless.  However, bumping my efficiency up a handful of points and saving a dollar or two on grain just doesn't seem worth the extra heating and effort when that is what I am specifically trying to avoid. 

2nd:  It let's me brew more.  Now I know not everyone is into this seeing that people are strapped for time so people moving from five gallon batches tend to move to ten or fifteen rather than move down to three or less.  But for me I like the process and more importantly I like experimenting with ingredients and recipes.  I feel safer trying out new things on small stages rather than jumping straight to a five gallon recipe.  So far small batches of BIAB have allowed me to test out a Smoked Imperial Stout, an English Barleywine, my Hybrid Citraburst, and I have a slew of other recipes waiting for testing.  

3rd:  While this wasn't my experience, I could see BIAB being a great introduction to all grain brewing.  It is cheap, easy and a step up from extract brewing.  Instead of jumping off the deep end it would offer a brewer the chance to spend a few bucks on a proper bag and maybe a bit more on a larger pot which they will need anyways for all grain brewing or full volume extract brews.  It potentially could be a nice intermediate step.


Picture
The Pacific Belgian.  An aggressively hopped IPA utilizing exclusively New Zealand variety hops and a Belgian yeast strain.  Brewed.  Fermented.  Racked.  And dry hopped.  Everything is going smoothly as it makes its way to the keg next week....oh wait....what is that....why are you foaming....oh crap what do I do....panic....ummm.....

Well as you can tell I got my very first taste of a dry hopping explosion and it wasn't pretty.  Not sure why this has never happened before or really why it happened this time but I lost what appears to be nearly all of my two ounces of New Zealand hops which in a liquid foamy form unsurprisingly makes a huge mess.    I "solved" the problem as best I could by grabbing the camera and deciding to wait it out.

From what I gather I am not the first person to experience this mess.  As a byproduct of fermentation CO2 is emitted which we all know.  However, when CO2 remains suspended in the beer for whatever reason and is exposed to a solid such as hop pellets a nucleation site is formed where the CO2 will begin to escape.  According to the Nucleation Wikipedia page (I know right, don't use Wikipedia as a reference) another example would be when bubbles of CO2 trapped in a carbonated Diet Coke nucleate upon touching the surface of a bunch of Mentos.

So why is there so much suspended CO2?  For my beer I'm not sure.  If a beer/liquid is at a lower temperature CO2 saturates it more easily.  This is why a cold keg will carbonate fast than a warm keg or why priming sugar calculators ask for the temperature of the beer.  The Pacific Belgian was sitting at a warm 72* so cross that off.  It could also be due to an unfinished fermentation.  Well, it's been over a month with a steady FG of 1.007 so I'm pretty sure it's done.  So for some reason I had a ton of CO2 in my beer which was evident when I tasted the sample I pulled before adding the dry hops.  Swishing it around in my mouth it felt almost like a under-carbonated beer.

So, how can someone avoid this in the future?  Well, make sure fermentation is finished, your beer is at a warm temp and you have adequate space in your carboy for dry hopping.  Also, this problem can be alleviated by racking onto hops so that if you notice excessive foaming you can simply stop the flow of beer temporarily while it dies down.  Most importantly though it would seem that you should know that this can happen and you should plan for it.  Something I was unaware of and obviously did not do.  Now, off to the store for more hops since I lost all of mine.


Picture
The wort is cooled, the yeast is pitched and the decocted Oktoberfest is sitting downstairs after what can only be described as an epic brew day.  So now the questioning begins; was it worth it?  Obviously without the final product here in front of me there is no real way of knowing but at least I can talk about it from the perspective of someone who just finished the process so I’ll briefly run through some pros and cons of my decoction mash today.  If you are reading this and don’t know much about decoction mashing here are some links I looked up to do my research:

http://byo.com/stories/techniques/article/indices/45-mashing/541-decoction-mashing-techniques

http://beaconhillsbrewhouse.wordpress.com/2011/05/23/decoction-mashing-benefits-and-cons/

http://thebrewingnetwork.com/shows/527

Pros:

1.      It was fun!  Honestly I like the homebrewing process as much as if not more than the finished product so I like to do things hands on when I have the time.  Decoction mashed definitely fit the bill.  It sounds weird but I feel more connect to this beer than any other because it was as hands on as you could without actually sticking your arms in your wort.  Endless stirring while standing directly next to a flaming burner was so much more work than any other normal, single infusion beer.

2.      My efficiency was through the roof.  Ten percentage points above my expected brewhouse efficiency to be exact which yielded me an Oktoberfest starting at 1.062 when I was shooting for 1.053.  Imperial Fest? 

3.      I got to sound cool talking to my friends about the history of the decoction mash and thoroughly enjoyed the process of learning more about it.  As a history buff this is the kind of stuff I like so when I combine it with beer I’m pretty much in heaven.

Cons:

1.       It really, really, really took a long time.  I did a protein rest which I normally bypass, pulled and boiled a ton of grist to get up to 147*, let it sit, pulled more and boiled to get up to 156*, waited, pulled the wort which I heated up for a mashout addition at 168* and then did my normal batch sparging routine.  For someone who has been working on transforming their brew day into an efficient well oiled machine this was definitely different.

2.      I struggled to hit my temps and needed additional boiling water each time to bring them up.  I need to do some research on this but I took the lazy route and let Beersmith dictate my schedule for me and it did not work out well.  I’m not positive in this but my hypothesis is that I pulled to thickly from the grist without enough liquid which caused unequal heating when adding back the boiled grist. 

3.       I burned through a ton of propane today.  Because I like to conserve energy sources as much as possible and because I’m super cheap I’ve been trying to cut back on propane usage lately which has resulted in heating strike water on the stove top instead of on the propane burner.  I guess I could have boiled my decoctions on the stove tops as well but it was such a nice day outside that I did it on the burner and when combined with a ninety minute boil I really put a dent in my propane supply.

So that leaves the lingering question; was it worth it?  In the end I think it was simply because of the first pro that I listed; it was fun.  With today’s improved malt quality, the invention of the thermometer and the ease of a “normal” brew day I’d say there is no way a decoction mash could be worth it if you are not enjoying the added work.  Like I said, it really, really took a long time to do and was very intensive both mentally and physically so if you aren’t interested in adding a somewhat unnecessary historical method to your beer I don’t think you should do it.  If you’re a hands on beer nerd who likes to do more than what is required than this might be for you to try at least once. 

Just finished up what seemed like an epic brewday

 
So I have Designing Great Beers by Ray Daniels and have skimmed through the chapter regarding Oktoberfest's and come up with a starting point for a brew but have little experience in drinking them, no experience in brewing them and would love, love, love any suggestions from tried and try recipes if you have one.  I realize that traditionally this should have been brewed early and aged all summer but I don't have a traditional lager cave anyways so I'm going to try and cram it in at the end  in August, lager through September and drink sometime in October.